If you’re planning to refresh your kitchen or bathroom, installing a silver peel and stick backsplash can be a smart and stylish solution. These tiles are affordable, easy to install, and bring a modern, clean look to your space. With their shiny silver finish, they match well with many different styles—whether you’re into industrial, minimalist, or contemporary decor.
In this guide, we’ll walk you through everything you need to know about silver peel and stick backsplash tiles—from what they are and why people love them, to how to install and maintain them.
What Are Silver Peel and Stick Backsplash Tiles?
Silver peel and stick backsplash tiles are self-adhesive wall coverings made to look like real metal or ceramic tiles. They have a sticky back that allows you to simply peel the tile and press it on a clean surface. No grout, no glue, and no special tools are needed.
These tiles usually come in sheets or panels, often designed to mimic real materials like stainless steel, brushed nickel, or aluminum. Some have a smooth metallic finish, while others might have a textured or patterned look to add depth and interest.
Why Choose Silver Peel and Stick Backsplash?
There are several reasons why these tiles have become popular with homeowners and renters alike:
1. Easy DIY Installation
You don’t need to hire a contractor or buy heavy tools. These tiles can be applied directly to your wall with just a ruler, utility knife, and a little patience.
2. Stylish Appearance
Silver adds a clean, shiny, and modern touch to any room. It works well with white cabinets, black countertops, wood accents, or even bold, colorful designs.
3. Budget-Friendly
Compared to traditional tiling, peel and stick options cost much less. You save on labor and materials, making it perfect for budget makeovers.
4. Removable and Replaceable
Perfect for renters or anyone who likes to switch up their décor often. These tiles can usually be removed without damaging the wall underneath.
5. Durable and Water-Resistant
Most peel and stick backsplash tiles are made to handle the heat and moisture found in kitchens and bathrooms. They resist splashes, steam, and minor wear and tear.
Best Places to Use a Silver Peel and Stick Backsplash
Silver tiles are incredibly versatile and can be used in many parts of the home:
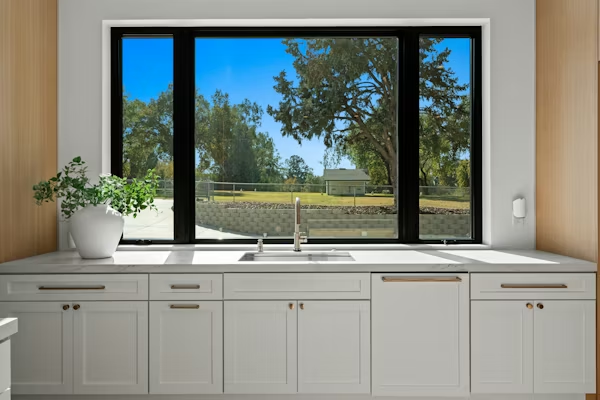
- Kitchen backsplash: Behind the stove or sink, they provide a sleek, easy-to-clean surface.
- Bathroom walls: Use them behind the vanity mirror or around a tub (outside the direct water stream).
- Laundry rooms: Add style and protect your walls from detergent spills and moisture.
- Accent walls: In living rooms or hallways, silver tiles can add an eye-catching feature.
- RV or camper interiors: Lightweight and simple to apply, these tiles are ideal for small spaces on the go.
What You Need for Installation
Before you get started, gather the tools and materials you’ll need:
- Silver peel and stick backsplash tiles
- Ruler or measuring tape
- Utility knife or heavy-duty scissors
- Level
- Pencil or chalk
- Clean cloth or sponge
- Mild cleaner (like soap and water)
Step-by-Step Guide to Installing Peel and Stick Backsplash Tiles
Here’s a beginner-friendly walkthrough to help you get great results.
Step 1: Clean the Wall
Use a mild cleaner to remove grease, dust, or debris from the surface. Let it dry fully before applying tiles. A smooth and dry wall ensures better adhesion.
Step 2: Measure the Area
Measure the height and width of the space you want to tile. Calculate how many sheets or panels you’ll need. It’s wise to order 10% more to account for cutting and mistakes.
Step 3: Plan Your Layout
Dry-fit the tiles by placing them on the wall without removing the backing. This helps you decide on the best pattern and placement, especially if your tiles have a repeating design.
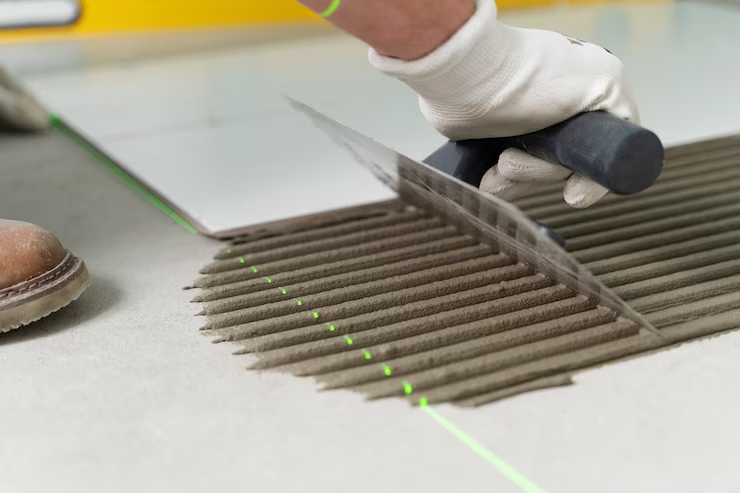
Step 4: Start Peeling and Sticking
Peel the backing off the tile and carefully press it to the wall. Start from the bottom center and work your way out and up. Press firmly to make sure there are no air bubbles.
Step 5: Trim Around Edges and Outlets
Use your utility knife to trim tiles around corners, edges, or electrical outlets. Be precise for a clean, professional look.
Step 6: Smooth Everything Down
Once all tiles are in place, run your hand or a soft roller over them to ensure they’re firmly attached.
Style Tips for Silver Backsplash Tiles
Here are a few ideas to help your backsplash pop:
- Mix and match with other tiles: Pair silver tiles with white or black ones for a checkerboard or striped pattern.
- Under-cabinet lighting: Lights above the silver tiles will reflect beautifully, making your space look brighter.
- Contrast with dark colors: Silver stands out well against navy blue, charcoal gray, or matte black walls.
- Use as a border or trim: If you don’t want to do a whole wall, silver tiles work great as an accent border.
Cleaning and Maintaining Your Backsplash
One of the best things about peel and stick backsplash tiles is how low-maintenance they are. Still, here are a few tips to keep them looking their best:
1. Wipe regularly
Use a damp cloth or sponge to clean off grease and dust. Mild soap is fine, but avoid harsh chemicals or abrasive scrubbing pads.
2. Watch the heat
Most tiles are heat-resistant but placing them too close to open flames or intense heat (like from a gas stove) can cause warping. Use a heat shield if needed.
3. Fix any loose edges
If any corners start to lift, press them back down. If they don’t stick, you can apply a small amount of clear adhesive to hold them in place.
4. Don’t soak
While these tiles are water-resistant, they aren’t meant to be submerged. Avoid spraying water directly on them or using them inside the shower area.
Frequently Asked Questions
Q: Can I install peel and stick tiles over existing tiles?
A: Yes, as long as the old tiles are smooth, clean, and dry. Rough or uneven surfaces may affect adhesion.
Q: Will they fall off over time?
A: When applied correctly, they stay in place for years. Proper surface prep is key.
Q: Can I cut them to fit tight spaces?
A: Absolutely. Use a sharp utility knife or heavy-duty scissors for clean cuts.
Q: Are these tiles waterproof?
A: They’re water-resistant, which is perfect for most backsplash areas. But they shouldn’t be used where they’re constantly soaked.
Common Mistakes to Avoid
- Skipping the cleaning step: Dirt and grease prevent tiles from sticking properly.
- Using on textured walls: Bumpy surfaces don’t allow full contact, leading to peeling.
- Applying in very hot or cold conditions: Extreme temperatures can affect the adhesive.
- Not measuring first: Planning your layout ensures you get the best results and save time.
Alternatives to Silver Tiles
If silver doesn’t suit your design taste, there are plenty of other peel and stick backsplash options available:
- White subway tiles for a clean, timeless look
- Marble-style peel and stick for a luxurious finish
- Brick patterns for rustic or farmhouse vibes
- Glossy black or metallic gold for bold, modern designs
Still, silver remains a popular choice because of its ability to blend with so many styles and color palettes.
Final Thoughts
Silver peel and stick backsplash tiles are a practical and stylish way to upgrade your kitchen, bathroom, or any other space in your home. They’re simple to install, affordable, and easy to maintain. Whether you’re doing a full remodel or just want a weekend DIY refresh, these tiles are a solid choice.
With a little planning and care, you can give your home a modern touch that looks professionally done—without the price tag or the mess.